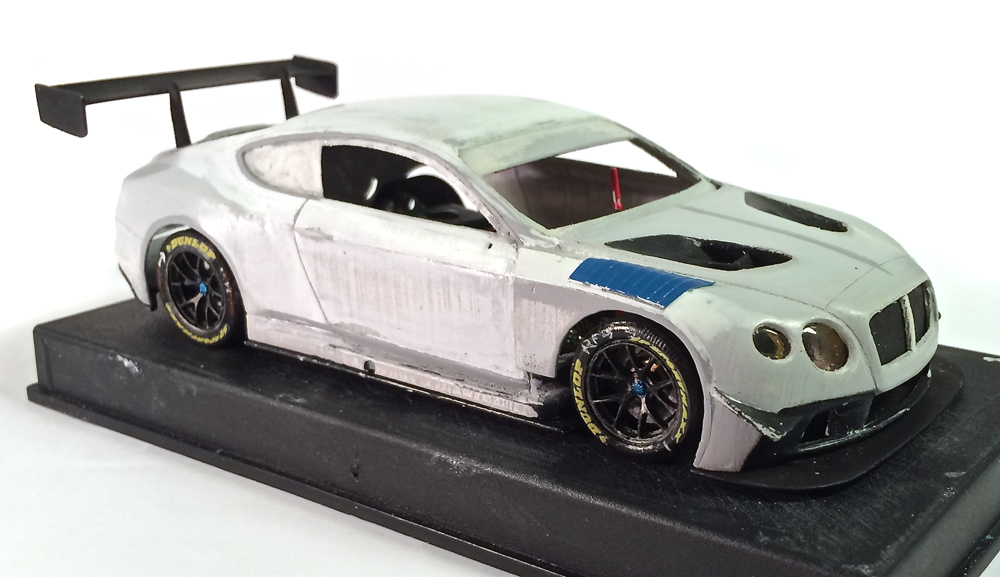
 Finally had some time to make some updates on the Conti, its been quite busy with building and testing all the different cars for the 1st DiSCA GT3 event in Manchester on July 30th. Finally had some time to make some updates on the Conti, its been quite busy with building and testing all the different cars for the 1st DiSCA GT3 event in Manchester on July 30th.
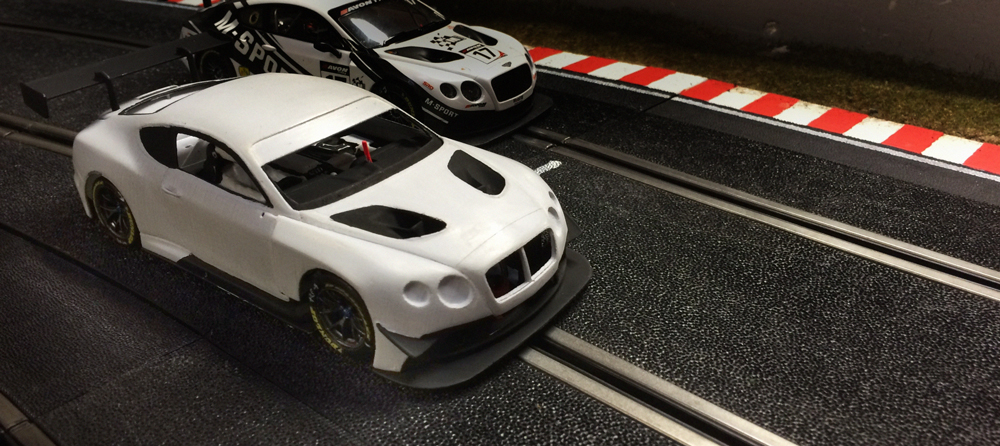
With just a month to go it was about time that the TA71S Bentley joined the party.
So before I took her out for a spin, I got her dressed up, amazing what a few well placed brush strokes semi-gloss black can do to transform the looks of a car...and it can be functional as well. Just check the scratch marks on the chassis and rear diffuser, perfect tell tales of where the car bottoms out and if the front body float causes the diffuser to drag (under acceleration).
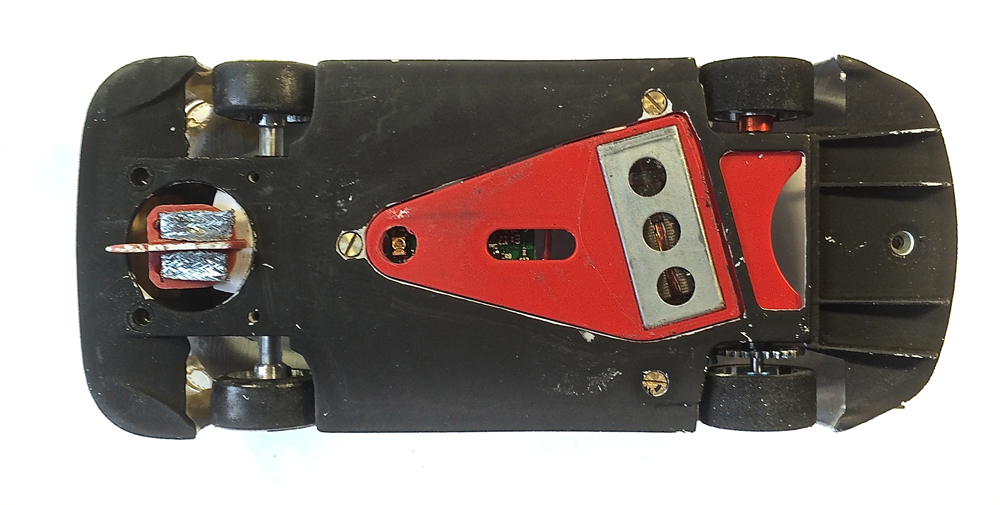
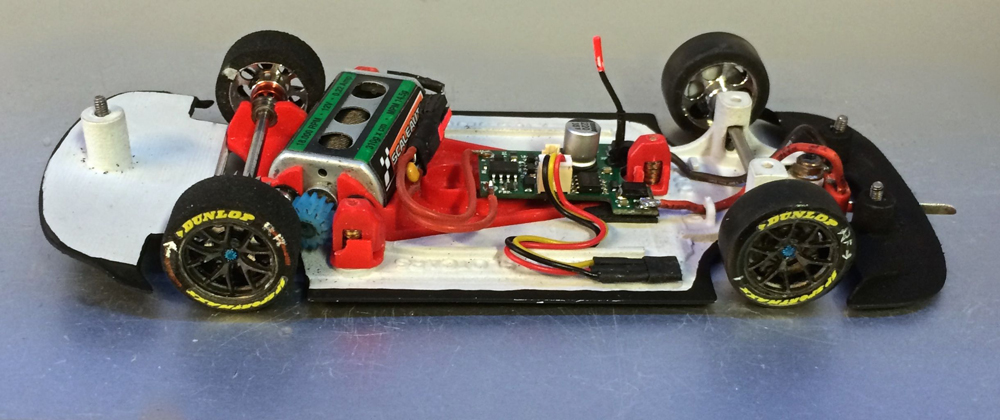
As the dress code for Manchester is ...digital...I needed to have her chipped, which was pretty straight forward with all the experience I racked up with the Suzuka200 NSR C6R and the DiSCA 24hrs C7R.
Won't go into further chipping detail here, I'll save that for the [url=https://www.slotforum.com/forums/index.php?s=&showtopic=127001&view=findpost&p=1482257]DiSCA GT3 test topic.[/url]
With the body balasted to 19,1gr the Conti ran pretty well on her first digital outing. Did a few runs on sponge with a very basic NSR set-up, fast and with that long wheel base..very stable.
The only flaw I noticed is that sometimes under full load in a right turn, the left side of the body slides over the edge of the chassis.
May need to add two small support tabs, just in front of the rear wheels.
More Body (detail) work
Back at home I stripped of the black paint on the windowsils. The kit comes with a set of nice lasercut windows with (nice touch) protective foil. For some odd reason the kit lacks rear quarter windows.
Their fit in the window sills is very good but the sills are too shallow so the windows are not mounted flush with the bodywork.
I guess most slotters can live with that...but not me, even when correcting it is really a shitty job to do. That SLS body material is really, really tough to cut or sand.
But removing the B pillar was relatively easy compared to recessing the window sills where there wasn't that much material left to begin with.
So here I used a combination of scraping the windowsills down to the bare SLS material and added some extra material with Mr Surfacer 1200 liquid primer on top of the roof and roof pillars
(here are the "before" pictures )
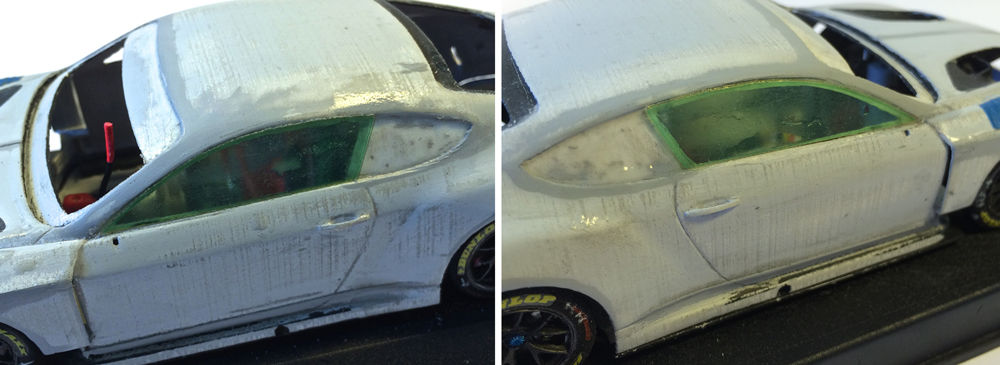
With the window sills done, the rest of the work was relatively straight forward.
Liquid primer was also used to build up material for the small step that was missing on the bottom of the doors, mask off the area and build up in several layers with a brush.
Sand between layers when needed.
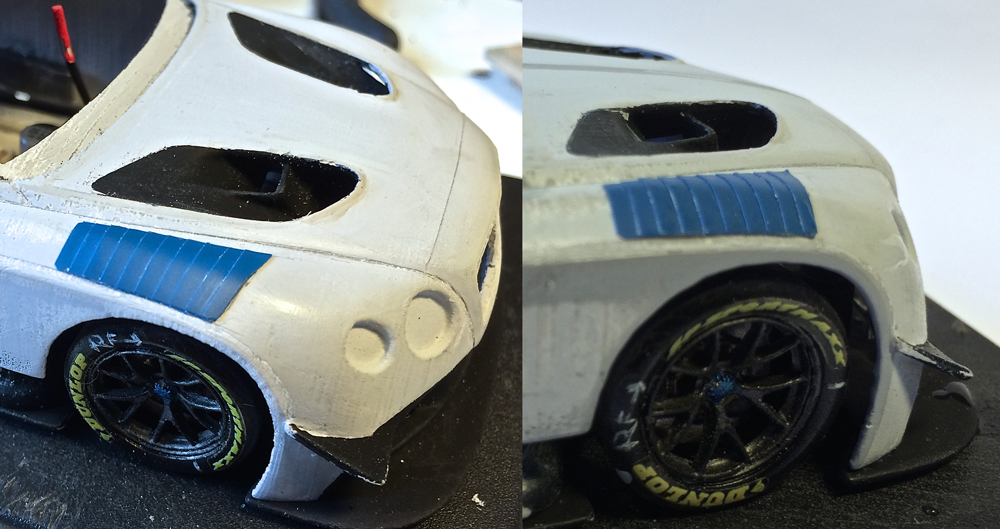
Managed to find a solution for the fabrication of the part I had dreaded the most, the Louvres on top of the front wings.
I looked in my parts bin and found nothing that would work, tried bending plastic sheet but could not get the same match every time.
So I was about to make a cast of the fender to use as a patern, when I noticed I had some thick automotive vinyl tape they use to pinstripe cars.
It had more or less the right width, so starting from the rear I tiled the strips of tape with an overlap working my way forward, cutting them to shape on the body.
A couple of coats with primer and they"ll blend right in...so happyness here.
SLS might be pain in the ass to cut and sand, but its an ideal material for fragile parts like side mirrors and wings and wing supports. Very hard to break
However that's exactly what DHL managed to do, shipping it to Gaydon was the swan song for one of the swann neck supports.
So I cut both off, made a template and recut them in rubber. This should make them survive even the most horrid crashes...although
...never.. ever....underestimate the brute force of nature yielded by an impudent Marshall

Used masking tape and liquid primer to do the small strip that surround the side windows.
For the sharp knive edge ridge over the hood centreline I alternated masking the left and right of the centreline brushing the primer against the tape edge.
I left the edge sharp on purpose, the layers of paint and clear will blend that to a soft edge.
Last but not least I cut out the headlights. The kit provides lenses for the head and taillights, but they are flat and again, I.m.o. if you mount them to the body, the headlight lenses do not sit deep enough.
When I [url=https://www.slotforum.com/forums/index.php?s=&showtopic=127001&view=findpost&p=1468458]installed the lights on the Scalex Conti [/url]I'd noticed that there was some nice detail on the inside of these lenses,
With a bit of tinkering and reshaping a set of Scalex Conti headlight lenses now fit perfectly...well...almost.
If I use vacforming to copy them I'' loose all that detail so I might try to cast them in clear resin.
That or a certain Scalex Conti will have act as a donor [img=https://www.slotforum.com/forums/style_emoticons/default/wink.gif]
Ok that's it for now, the conti may look a bit scruffy and ragged right now with als the different layers of primer but the final layers will cure that.
Still got to do the left fender louvres, the fog lights and move the side exhaust further back...but we're getting there..slowly.
Still got 30 day's or so [img=https://www.slotforum.com/forums/style_emoticons/default/rolleyes.gif] [img=https://www.slotforum.com/forums/style_emoticons/default/wink.gif]
with kind regards
Tamar
|


